
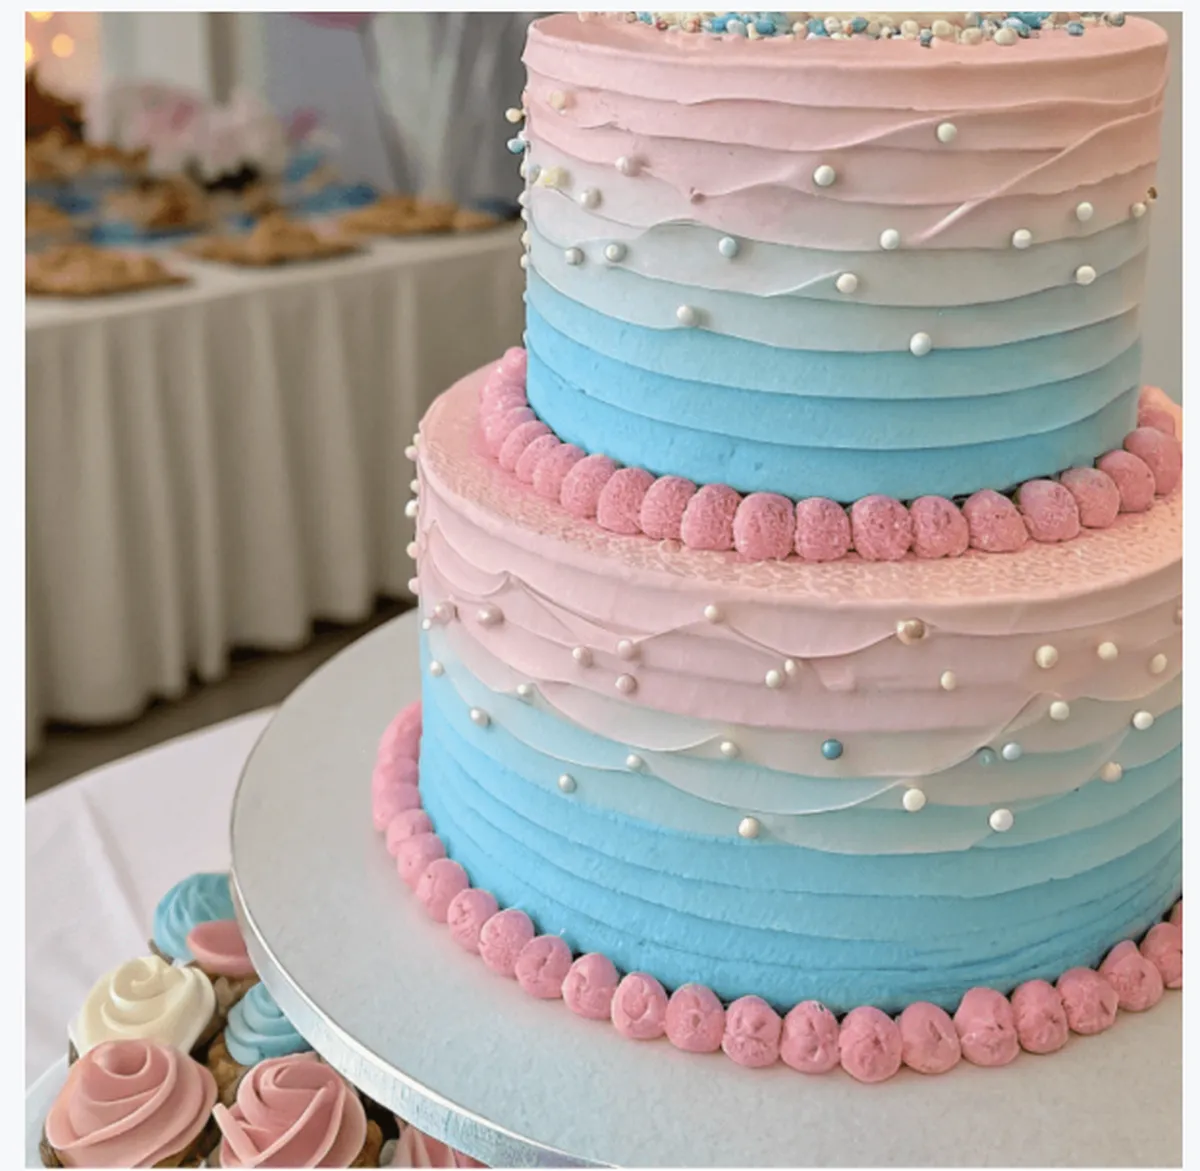
Make Your Own Gender Reveal Cake and surprise your guests with a sweet, unforgettable reveal!
Gender reveal cakes are a fun and unique way to celebrate your growing family. Not only are they delicious, but they also add a personal touch to your party, making it an event everyone will remember. Whether you’re hosting a baby shower, a surprise gathering, or simply want to share the joy with close friends and family, a homemade cake is the perfect centerpiece.
In this guide, we’ll walk you through everything you need to create the perfect gender reveal cake, including easy-to-follow recipes, step-by-step instructions, decorating tips, and creative ideas.
Let’s get started and make this celebration as sweet as your cake!
Ingredients Needed To Make Your Own Gender Reveal Cake
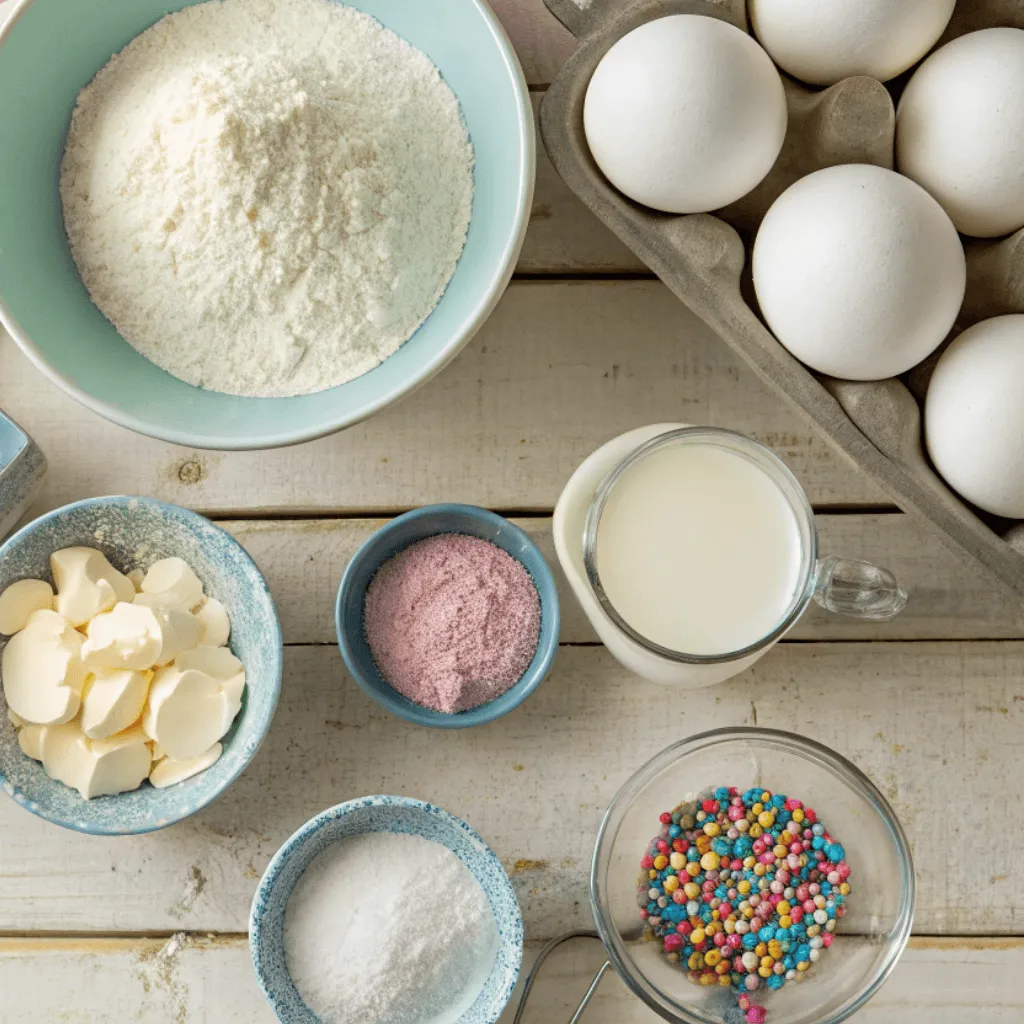
The first step in creating a perfect gender reveal cake is gathering the right ingredients. When making your own gender reveal cake, the ingredients you choose are crucial to getting a soft, flavorful cake that holds up well for the big reveal. Here’s what you need:
Flour, Sugar, and Baking Powder
Flour forms the structure of your cake, sugar adds the sweetness, and baking powder helps the cake rise. These three basic ingredients are staples for any cake. When you make your own gender reveal cake, it’s essential to measure them carefully to ensure the right texture. Too much flour can make your cake dense, while too little sugar can make it bland. Make sure to sift the flour to avoid clumps and help the cake batter become smooth and uniform.
Butter and Eggs
Butter provides richness, flavor, and moisture to your cake, while eggs act as the binding agent, helping the other ingredients come together. For the best results, use room-temperature butter and eggs to ensure they mix evenly. Cold butter can create lumps in the batter, while cold eggs may cause the mixture to curdle. The key is to cream the butter and sugar until it’s light and fluffy, which will help your cake layers rise perfectly.
Food Coloring
This is where the fun begins! Food coloring is the star of the show in a gender reveal cake. Most people opt for pink or blue to signify the baby’s gender, but feel free to experiment with other color options if you prefer a more neutral or unique approach. Gel food coloring is the best choice, as it provides vibrant colors without affecting the consistency of the batter. Liquid food coloring can sometimes make the batter too runny, so stick with gel for the brightest, most consistent results.
Optional Ingredients
Ingredients, such as vanilla extract, sprinkles, or chocolate chips, can take your gender reveal cake to the next level. Vanilla extract adds a warm, comforting flavor to the cake, while sprinkles or chocolate chips provide texture and fun visual appeal. If you’re looking to add a little extra flair, try incorporating flavored frosting or colorful candy decorations.
Step-by-Step Recipe to Make Your Own Gender Reveal Cake
Now that you have your ingredients ready, it’s time to get baking. The key to making your own gender reveal cake is following the recipe step by step. Here’s how to do it:
Ingredients for :
The Cake:
- 2 1/2 cups all-purpose flour
- 2 1/2 tsp baking powder
- 1/2 tsp salt
- 1 cup unsalted butter, at room temperature
- 1 1/2 cups granulated sugar
- 4 large eggs, at room temperature
- 1 tsp vanilla extract
- 1 cup whole milk, at room temperature
- Food coloring (pink or blue, gel-based recommended)
The Frosting:
- 2 cups unsalted butter, at room temperature
- 4 cups powdered sugar
- 2 tsp vanilla extract
- 1/4 cup heavy cream (adjust for consistency)
- Pinch of salt
- Optional: Food coloring for frosting to match the theme
The Hidden Surprise Filling:
- 1/2 cup of colored frosting (match the gender reveal color)
Instructions To Make Your Own Gender Reveal Cake:
Step 1: Preheat the Oven
Preheat your oven to 350°F (175°C). Grease and flour two 8-inch round cake pans, or line them with parchment paper circles to ensure easy removal after baking.
Step 2: Mix Dry Ingredients
In a large bowl, sift together the flour, baking powder, and salt. Sifting helps ensure that your dry ingredients are evenly distributed and prevents clumps from forming in the batter.
Step 3: Cream Butter and Sugar
In a separate large mixing bowl, beat together the butter and sugar using an electric mixer on medium speed for about 3-4 minutes, or until the mixture becomes light and fluffy. This step is key to making your cake soft and airy.
Step 4: Add Eggs
Add eggs one at a time to the butter and sugar mixture, beating well after each addition. This helps prevent the batter from separating. Stir in the vanilla extract.
Step 5: Combine Wet and Dry Ingredients
Gradually add the sifted dry ingredients to the wet ingredients, alternating with the milk. Start and end with the dry ingredients. Mix until just combined. Be careful not to overmix the batter, as it can make your cake dense.
Step 6: Add Food Coloring
Divide the batter evenly into two bowls. Add a few drops of pink food coloring to one bowl and blue food coloring to the other (depending on the gender). Stir each bowl gently to combine the coloring. You can add more coloring if needed to achieve the desired shade. Keep in mind that the color should be vibrant but not too thick, as too much food coloring can alter the batter’s consistency.
Step 7: Bake the Cakes
Pour the pink-colored batter into one prepared cake pan and the blue-colored batter into the other. Use a spatula to spread the batter evenly in the pans.
Place the pans in the preheated oven and bake for 25-30 minutes, or until a toothpick inserted into the center of the cakes comes out clean.
Once baked, remove the cakes from the oven and allow them to cool in the pans for about 10 minutes. After that, transfer them to a wire rack to cool completely. This prevents the cakes from becoming soggy or breaking apart during assembly.
Step 8: Level the Cakes
After the cakes have cooled, level the tops of both cakes using a serrated knife. This will help ensure that the layers stack evenly.
Step 9: Prepare the Filling
Take a small portion of frosting (about 1/2 cup) and color it with the same food coloring you used for the cake. You’ll use this colored frosting to hide inside the cake for the big gender reveal.
Step 10: Assemble the Cake
Layer the Cake: Place one of the cake layers (blue or pink) on a serving plate or cake stand. Using a serrated knife, carefully cut a small hole in the center of the cake, deep enough to create a cavity but not so deep that it goes all the way through the cake.
Fill the Hole with Frosting: Fill the hole with the colored frosting. This is the surprise that will be revealed when the cake is cut! Be generous with the frosting to ensure that it’s visible when you slice into the cake.
Stack the Second Cake Layer: Place the second cake layer (the opposite color) on top of the first layer, carefully lining it up with the edges.
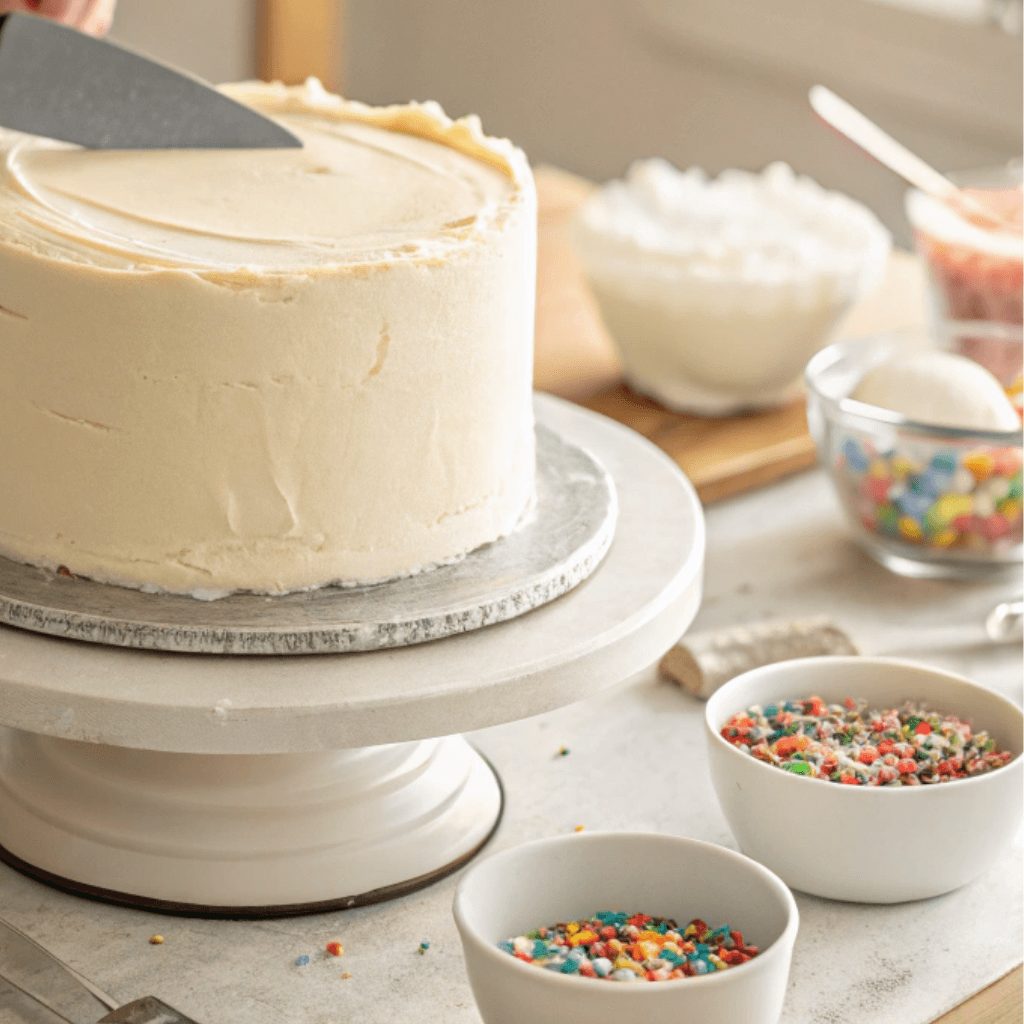
Step 11: Frost the Cake
Now, frost the entire cake with the remaining buttercream frosting. Use a spatula to spread the frosting smoothly over the cake, covering both the top and sides. You can also create a textured look by using a cake comb or spatula to add some design to the frosting.
Step 12: Decorate the Cake
For a simple yet beautiful decoration, add sprinkles in pink or blue, depending on the gender reveal color. You can also decorate the top with baby-themed cake toppers, such as mini baby shoes, pacifiers, or a “Boy or Girl?” sign.
For a more intricate design, pipe rosettes or stars along the edges of the cake using a piping bag fitted with a star tip. You can also add edible glitter, ribbons, or fondant shapes to make the cake even more festive.
Step 13: Serve and Enjoy
When it’s time for the big reveal, slice into the cake and watch your guests’ reactions as the colored frosting spills out! It’s a fun and sweet way to share the news of the baby’s gender with your friends and family.
Serve the cake, and let everyone enjoy the delicious flavors and the joy of the moment. You’ve successfully made your own gender reveal cake!
Simple Decoration Ideas for Your Gender Reveal Cake
A well-decorated cake adds the perfect finishing touch to your gender reveal party. Whether you’re aiming for a simple look or an elaborate design, here are some ideas to help your cake shine.
Frosting Techniques
When it comes to frosting your gender reveal cake, you can go as simple or elaborate as you like. The classic buttercream frosting works great for this type of cake, providing a smooth, creamy layer that complements the cake’s flavors. Use a spatula to spread the frosting evenly over the cake. If you want a more intricate design, try using a piping bag to create rosettes, stars, or other decorative patterns on top of the cake.
If you want to add extra flair, consider adding colored buttercream accents to match the pink or blue theme. For example, you could pipe a thin border along the edges of the cake with contrasting colors or create a gradient effect to give the cake a soft, ombre look.
Adding Sprinkles or Edible Decorations
One of the easiest ways to make your cake look festive is by adding sprinkles or edible decorations. Choose sprinkles in the colors that match your theme—either pink, blue, or neutral tones. You can sprinkle them around the base of the cake, on top, or even inside the cake layers for a fun surprise when you cut into it.
Edible glitter, baby-themed cake toppers, or fondant decorations like baby booties or pacifiers also work great. These small details will make your gender reveal cake stand out and look Instagram-worthy!
Topping Ideas
A cake topper is another excellent way to personalize your gender reveal cake. You can opt for a simple “Boy or Girl?” sign, or choose baby-themed toppers like little shoes, baby bottles, or animals. If you’re going for a more elaborate design, consider using a fondant or sugar paste topper shaped like a stork or baby items.
Decorative ribbon or small banners can also add a whimsical touch. Place them around the top of the cake for a playful and celebratory feel. These small additions can elevate your cake’s presentation and make it even more special.
Tips to Make your Own Gender Reveal Cake
Creating a flawless gender reveal cake requires a bit of care and attention to detail. Follow these expert tips to ensure that your cake turns out perfectly every time.
Make Ahead: You can bake the cakes a day in advance and store them in an airtight container to save time.
Ensure Even Layers: One common issue with cake baking is uneven layers. To prevent this, make sure to divide the batter evenly between the cake pans. If you notice that one layer is thicker than the other, use a spatula to smooth the batter evenly across the pans. You can also use a cake leveler to ensure the layers are flat and even.
Don’t Overmix the Batter: Overmixing the batter can make the cake dense. Mix until just combined to keep the texture light.
Choosing the Right Food Coloring: Using the right food coloring is crucial to getting the vibrant pink or blue reveal effect. Gel-based food coloring is the best option because it delivers rich, bold colors without changing the consistency of the batter. If you’re using liquid food coloring, be careful not to add too much, as it can make the batter runny and affect the texture.
Preventing Cake Cracks: Cracking can happen if the cake is baked too quickly or at too high of a temperature. To avoid this, make sure your oven is preheated to the correct temperature before you put the cakes in. Additionally, allow the cakes to cool gradually instead of opening the oven door too early. This helps prevent shrinkage, which can lead to cracks.
Creative Variations To Make Your Own Gender Reveal Cake
If you want to get even more creative, try these fun gender reveal cake variations:
Cupcake Gender Reveals
Instead of a traditional cake, opt for cupcakes. Bake individual cupcakes and hide the gender-revealing color inside. When your guests bite into the cupcakes, they’ll be greeted with a surprise! Cupcakes are also perfect for smaller parties or those who want to avoid cutting a large cake.
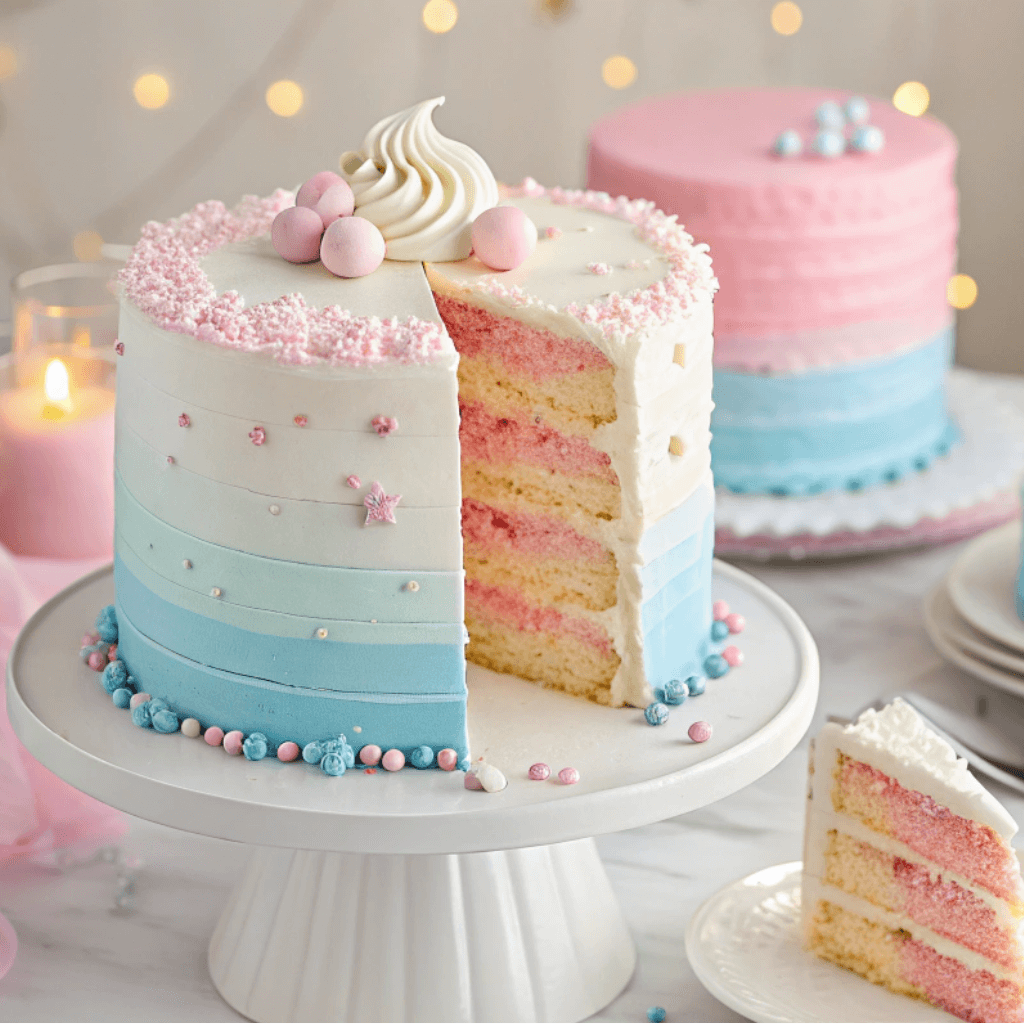
Layered Ombre Cakes
A layered ombre cake adds a touch of elegance to your gender reveal. Instead of using just two colors, create a gradual transition from light to dark pink or blue. This technique is visually stunning and gives your cake a beautiful, artistic flair.
Themed Cakes
For a more personalized touch, incorporate a theme into your gender reveal cake. You can design the cake with cute baby items like rattles, pacifiers, or animals. Whether it’s a jungle theme or a whimsical baby theme, this type of cake will be unique and memorable for everyone.
Conclusion
Congratulations on learning how to make your own gender reveal cake!
Making your own gender reveal cake is a fun, creative, and delicious way to share the exciting news with your friends and family. With a simple recipe and a few easy-to-follow steps, you can create a beautiful cake that not only tastes amazing but also surprises your guests. From choosing the right colors to baking and decorating, this cake is the perfect centerpiece for any gender reveal celebration.
Additionally, the hidden surprise inside will make the moment even more memorable, leaving everyone talking about it long after the party ends. Whether you choose pink or blue, the joy and excitement will be contagious!
Remember, the key to a successful gender reveal cake lies in preparation, creativity, and attention to detail. Don’t be afraid to get creative with your decorations, and have fun with the process! Most importantly, enjoy the journey of sharing this special moment with your loved ones.
Ready to bake your own gender reveal cake? Follow this simple recipe and surprise your guests with a sweet twist. Share your cake-making journey with us.